
TC2/XB2/IM Rear Mid Chassis Brace Installation Guide
Congrats on purchasing your TB Performance Products Rear Mid Chassis Brace! In 30 minutes to 1 hour youll be free of pesky exhaust rattles and have some added cornering grip!
Step 1.) Put your car in the air via jacks or ramps. Some people may be able to install without putting the car in the air.
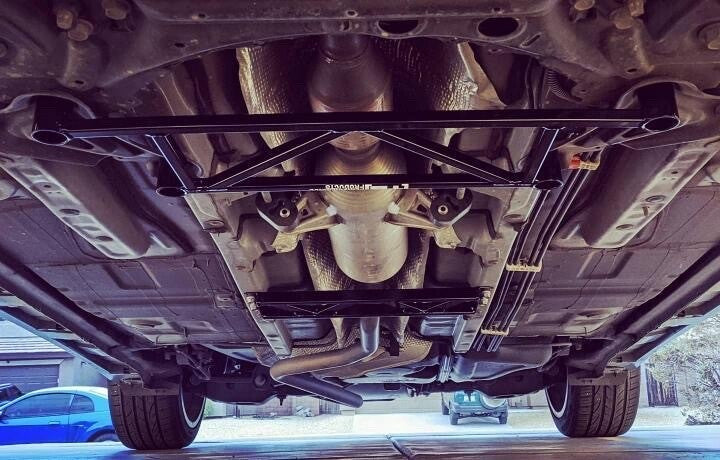
Step 2.) Locate the location for the brace to install to. This brace replaces the oem stamped steel unit in the exhaust tunnel.
Step 3.) Remove the 4 bolts.
Step 4.) Slip the brace on
Step 5.) Install brace reusing the OEM hardware. Make sure you leave all four bolts loose while installing. This will keep the brace from getting cocked and making reinstallation of the bolts difficult.
Step 6.) Tighten all bolts down. For your exact years torque spec please call your local dealership.
Step 7.) Remove ramps or jacks
Step 8.) Take your car for a rip and enjoy the added traction and grip!
Notes:
-If you have difficulties or questions about installing check out the TB Performance Products Army Facebook group. There are a ton of fellow scion owners who have installed these braces. Its a friendly place to ask questions
-On the XB2 models, if you are using the oem exhaust you may encounter a rattle on the oem resonator. This is easily fixed by installing some 1/2” USS washers between the brace and the chassis. This will act as a shim that gains clearance over the factory system. These washers can easily be purchased from any hardware store for a few cents a piece.