
Fiesta ST Trunk Brace Installation Guide
Congrats on purchasing your Trunk Brace for your Fiesta ST! This brace is super easy to install. In just a few minutes youll have this brace installed and be out enjoying better handling and increased rear end grip!
Step 1.) open the hatch of the car
Step 2.) remove all items in the trunk that may be floating around
Step 3.) remove the trunk floor and remove all foam and tooling to give yourself a nice work space
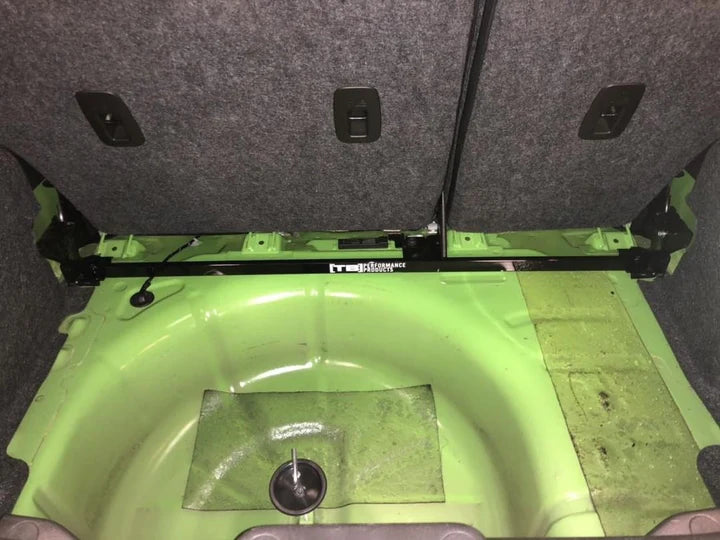
Step 4.) remove the two torx seat bolts that the brace installs to. These are right behind the rear seat one on each side.
Step 5.) install the brace reusing the oem hardware
Step 6.) reinstall foam and all tools back into the trunk.
Step 7.) some cars may need a slight trim of the foam under the trunk floor to get it to sit flush. Use a dremel tool or razor blade to make the trim. Go slowly and only remove small amounts checking each time.
Step 8.) close the hatch and take her for a rip!
Notes:
-If you get clunking noises, this brace is not likely to be the cause unless you grossly undertightened the bolts. Common areas for clunking noises are end links, sway bar mounts, sway bar bushings, strut hat bushings, ball joints. We have never had this brace cause noises so check elsewhere.
-if you have issues with installation check the TB Performance Products Army Facebook page! There are loads of customers who have installed these parts and can help you out.
-You will NOT need an alignment after this install.